Microservice using spring boot
A hands on tutorial about spring and microservice


What is a microservice?
Microservices are a software architecture approach where an application is divided into small, independent and self-contained services that communicate with each other through APIs. This allows for faster development, deployment and scalability.

a microservices architecture built with Spring Boot. Here's a breakdown of its components:
Student and School: These represent two example microservices within the system. You can replace them with the functionalities of your application (e.g., ProductService, OrderService).
Docker: Docker containers are used to package and deploy the microservices. This promotes independent deployments and scalability.
API Gateway: Spring Cloud API Gateway serves as a single entry point for incoming API requests. It routes the requests to the appropriate microservice based on the path.
Eureka (Discovery Server): Eureka Server helps with service discovery. Microservices register themselves with Eureka, and the client application retrieves the service addresses to interact with them.
Config Server: This component is responsible for managing configuration details (like database connection strings) across all the microservices. Each microservice retrieves its configurations from the Config Server.
ZIPKIN: Zipkin is a distributed tracing system, helpful for monitoring and debugging the interactions between the various microservices within the architecture.
Overall, this architecture leverages Spring Boot to create separate microservices that communicate with each other via APIs. The API Gateway acts as a central point of entry, while Eureka Server facilitates service discovery. This distributed system is designed to be scalable and maintainable.
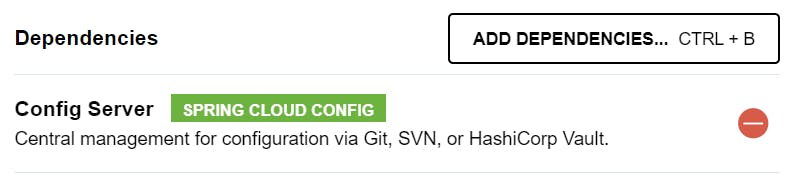
Config Server
Here's an explanation of configuring a Spring Boot Config Server with both Git and native search location approaches:
1. Config Server with Git:
This approach retrieves configurations from a remote Git repository.
- Add Dependencies:
Include the following dependencies in your Config Server's pom.xml
@EnableConfigServer
@SpringBootApplication
public class ConfigServerApplication {

    public static void main(String[] args) {
        SpringApplication.run(ConfigServerApplication.class, args);
    }
}
add the @EnableConfigServer in the main class
- Properties Configuration:
Set the following properties in your application.yml file:
spring:
  profiles:
    active: native
  cloud:
    config:
      server:
        git:
          uri: https://stackoverflow.com/questions/31801271/what-are-the-supported-git-url-formats
          # Replace with your Git repository URL (e.g., https://github.com/user/config-repo.git)
          # Optional: Username and password for private repositories
          username: username
          password: password
2. Config Server with Native Search Locations:
This approach loads configurations from the local file system or classpath.
The required dependencies are included by default in Spring Cloud Config Server.
- Properties Configuration:
Set the following property in your application.yml file:
spring:
  profiles:
    active: native
  application:
    name: config-server
  cloud:
    config:
      server:
        native:
          search-locations: classpath:/configs
Below is the folder structure. name should be exactly the same as application name. <application.name>.yml

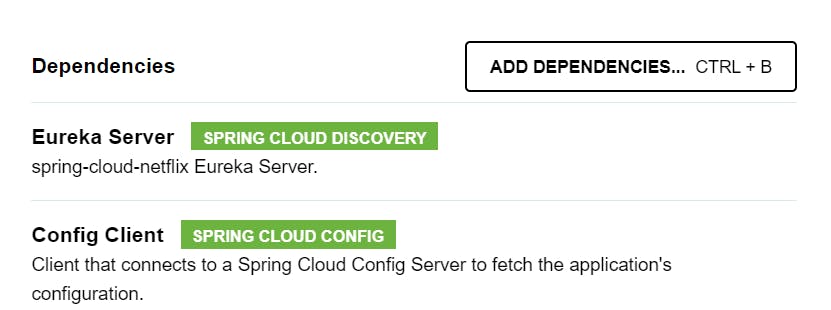
Discovery Server:
as we set up our config server, so we need config client in our discovery server.
application.yml
spring:
  config:
    import: optional:configserver:http://localhost:8888
  application:
    name: discovery
as you can see config importing from config server. Now goto config server and update the discovery.yml.
eureka:
  instance:
    hostname: localhost
  client:
    register-with-eureka: false
    fetch-registry: false
    service-url:
      defaultZone: http://${eureka.instance.hostname}:${server.port}/eureka/
server:
  port: 8761
set @EnableEurekaServer in the main class
@SpringBootApplication
@EnableEurekaServer
public class DiscoveryServerApplication {

    public static void main(String[] args) {
        SpringApplication.run(DiscoveryServerApplication.class, args);
    }
}
Gateway
First we need these dependencies

now set the application.yml
spring:
  application:
    name: gateway
  config:
    import: optional:configserver:http://localhost:8888
here as you can see config are importing from config server. Now got to config server and update the gateway.yml
eureka:
  client:
    register-with-eureka: false
server:
  port: 8222
spring:
  application:
    name: gateway
  cloud:
    gateway:
      discovery:
        locator:
          enabled: true
      routes:
        - id: students
          uri: lb://students
          predicates:
            - Path=/api/v1/students/**
        - id: schools
          uri: lb://schools
          predicates:
            - Path=/api/v1/schools/**
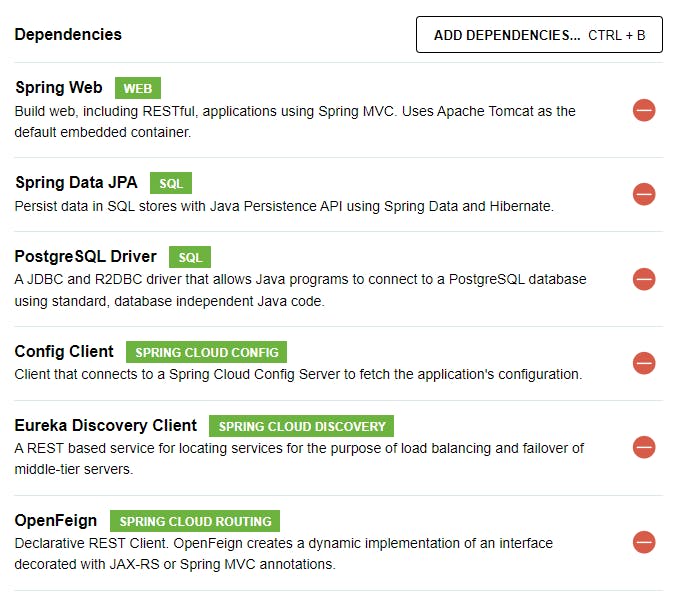
Student/School services:
Now its time to create our student and school microservices
Dependencies we need:
properties.yml
spring:
  application:
    name: students
  config:
    import: optional:configserver:http://localhost:8888
now update the config server properties for students.
eureka:
  instance:
    hostname: localhost
  client:
    service-url:
      defaultZone: http://localhost:8761/eureka

server:
  port: 8090
spring:
  application:
    name: students
  datasource:
    driver-class-name: org.postgresql.Driver
    url: jdbc:postgresql://localhost:5432/students
    username: admin
    password: admin
  jpa:
    hibernate:
      ddl-auto: create
    database: postgresql
    database-platform: org.hibernate.dialect.PostgreSQLDialect
using api calls using feign clinet
@EnableFeignClients
@SpringBootApplication
public class Application {

    public static void main(String[] args) {
        SpringApplication.run(SchoolApplication.class, args);
    }
}
@FeignClient(name = "student-service", url = "${application.config.students-url}")
public interface StudentClient {

    @GetMapping("/school/{school-id}")
    List<Student> findAllStudentsBySchool(@PathVariable("school-id") Integer schoolId);
}
Zipkin:
Prerequisites:
Docker installed and running on your system.
Basic understanding of Spring Boot and microservices architecture.
1. Define Your Microservices:
- Develop your Spring Boot microservices with functionalities like product management, order processing, etc.
2. Add Dependencies:
Include the following dependencies in your microservice pom.xml files:
XML
<dependency>
  <groupId>io.micrometer</groupId>
  <artifactId>micrometer-core</artifactId>
</dependency>
<dependency>
  <groupId>io.micrometer</groupId>
  <artifactId>micrometer-tracing</artifactId>
</dependency>
<dependency>
  <groupId>io.micrometer</groupId>
  <artifactId>micrometer-tracing-bridge-brave</artifactId>
</dependency>
<dependency>
  <groupId>io.github.openfeign</groupId>
  <artifactId>feign-micrometer</artifactId>
</dependency>
3. Run Zipkin Server:
docker run -d -p 9411:9411 openzipkin/zipkin
4. Enable Micrometer Tracing (Optional):
In each microservice's application.yml file, you can configure Micrometer with a tracing implementation (e.g., Zipkin):
YAML
micrometer:
  tracing:
    sampling:
      probability: 1.0
    zipkin:
      endpoint: http://localhost:9411/api/v2/spans
      # Replace with your Zipkin server URL
This configuration tells Micrometer to send tracing data to the Zipkin server running on http://localhost:9411.
5. Feign Client with Tracing:
Enable
FeignClienton interfaces that interact with other microservices in your project.The
feign-micrometerdependency automatically integrates tracing with Feign clients.
6. Service Discovery (Optional):
If your microservices use service discovery (e.g., Eureka), ensure your clients discover the service addresses correctly.
7. Running the Microservices:
Build and package each microservice into a jar file.
Run each microservice using
java -jar <your-application.jar>.
8. Accessing Zipkin UI:
Open localhost:9411 in your web browser to access the Zipkin server UI.
You should see traces being generated for your microservice interactions.
Additional Notes:
You can configure Brave for additional tracing features like sampling and logging.
Consider security aspects like authentication for accessing the Zipkin server in production environments.
Dockerize microservices
For on demand docker-compose file where we can only run the container for our local test.
services:
  postgresql:
    container_name: postgresql
    image: postgres
    environment:
      POSTGRES_USER: admin
      POSTGRES_PASSWORD: admin
      PGDATA: /data/postgres
    volumes:
      - postgres:/data/postgres
    ports:
      - "5432:5432"
    networks:
      - postgres
    restart: unless-stopped
  pgadmin:
    container_name: pgadmin
    image: dpage/pgadmin4
    environment:
      PGADMIN_DEFAULT_EMAIL: ${PGADMIN_DEFAULT_EMAIL:-pgadmin4@pgadmin.org}
      PGADMIN_DEFAULT_PASSWORD: ${PGADMIN_DEFAULT_PASSWORD:-admin}
      PGADMIN_CONFIG_SERVER_MODE: 'False'
    volumes:
      - pgadmin:/var/lib/pgadmin
    ports:
      - "5050:80"
    networks:
      - postgres
    restart: unless-stopped
  zipkin:
    container_name: zipkin
    image: openzipkin/zipkin
    ports:
      - "9411:9411"
    networks:
      - zipkin

networks:
  postgres:
    driver: bridge
  zipkin:
    driver: bridge

volumes:
  postgres:
  pgadmin:
But If we want to docarize the full application you can follow below instructions.
Step 1: Dockerize Each Microservice
For each microservice, create a Dockerfile to package the application into a Docker image. Here's an example Dockerfile for a Spring Boot microservice:
FROM openjdk:17-jre-slim

WORKDIR /app

COPY build/libs/<your-microservice.jar> app.jar

EXPOSE <your-microservice-port>

ENTRYPOINT ["java", "-jar", "app.jar"]
Step 2: Create Docker Compose File
Create a docker-compose.yml file to define and run your services. Here's an example with three services (microservices, PostgreSQL, and Zipkin):
version: '3.8'

services:
  config-server:
    build: ./config-server # Replace with path to your Config Server Dockerfile
    ports:
      - "8888:8888"
    networks:
      - microservice-network
    environment:
      spring.profiles.active: native

  discovery-server:
    build: ./discovery-server # Replace with path to your Discovery Server Dockerfile
    ports:
      - "8761:8761"
    networks:
      - microservice-network
    depends_on:
      - config-server

  api-gateway:
    build: ./api-gateway # Replace with path to your API Gateway Dockerfile
    ports:
      - "8080:8080"
    networks:
      - microservice-network
    depends_on:
      - config-server
      - discovery-server

  microservice1:
    build: ./microservice1 # Replace with path to your microservice1 Dockerfile
    ports:
      - "8081:8080"
    networks:
      - microservice-network
    environment:
      SPRING_CLOUD_CONFIG_URI: http://config-server:8888
      SPRING_CLOUD_REGISTRY_HOST: discovery-server:8761
      SPRING_DATASOURCE_URL: jdbc:postgresql://postgres1:5432/your_database_name
      SPRING_DATASOURCE_USERNAME: your_username
      SPRING_DATASOURCE_PASSWORD: your_password
    depends_on:
      - discovery-server
      - postgres1
    volumes:
      - postgres_data1:/var/lib/postgresql/data  # Optional, for persistent storage (modify based on your needs)

  microservice2:
    build: ./microservice2 # Replace with path to your microservice2 Dockerfile
    ports:
      - "8082:8080"
    networks:
      - microservice-network
    environment:
      SPRING_CLOUD_CONFIG_URI: http://config-server:8888
      SPRING_CLOUD_REGISTRY_HOST: discovery-server:8761
      SPRING_DATASOURCE_URL: jdbc:postgresql://postgres2:5432/your_database_name
      SPRING_DATASOURCE_USERNAME: your_username
      SPRING_DATASOURCE_PASSWORD: your_password
    depends_on:
      - discovery-server
      - postgres2
    volumes:
      - postgres_data2:/var/lib/postgresql/data  # Optional, for persistent storage (modify based on your needs)

  postgres1:
    image: postgres:latest
    environment:
      POSTGRES_DB: your_database_name
      POSTGRES_USER: your_username
      POSTGRES_PASSWORD: your_password
    ports:
      - "5432:5432"
    networks:
      - microservice-network
    restart: unless-stopped

  postgres2:
    image: postgres:latest
    environment:
      POSTGRES_DB: your_database_name
      POSTGRES_USER: your_username
      POSTGRES_PASSWORD: your_password
    ports:
      - "5433:5432"
    networks:
      - microservice-network
    restart: unless-stopped

networks:
  microservice-network:
    driver: bridge

volumes:
  postgres_data1: {}  # Optional, empty driver definition for local storage
  postgres_data2: {}  # Optional, empty driver definition for local storage
Step 3: Build and Run Services
Run docker-compose up from the directory containing your docker-compose.yml file. Docker Compose will build the images and start the containers for each service.
Step 4: Access Microservices and Zipkin
Access your microservices at
http://localhost:8081andhttp://localhost:8082, respectively.Access Zipkin at
http://localhost:9411to view the traces.
Notes
Ensure that your microservices are configured to connect to the correct PostgreSQL databases.
Adjust the database URLs (
SPRING_DATASOURCE_URL) and ports in the Docker Compose file as needed.Ensure that your microservices are instrumented with Spring Cloud Sleuth to send tracing data to Zipkin.
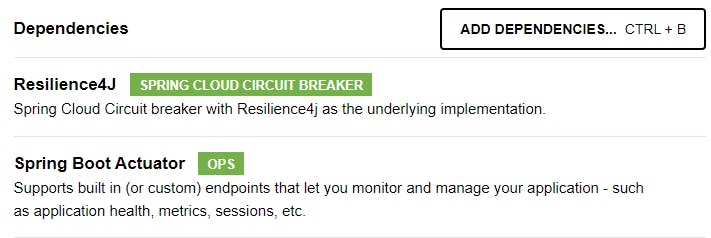
Resilence 4j
Resilience4j functionalities like Circuit Breaker, Retry, Bulkhead, and RateLimiter in your Spring Boot project:
1. Add Dependency:
First, add the required dependency to your project's pom.xml file:
Need to add aop also
<dependency>
    <groupId>org.springframework</groupId>
    <artifactId>spring-aop</artifactId>
</dependency>
2. Global Configuration (Optional):
While not mandatory, you can define global configurations for Resilience4j beans in your application.yml file:
YAML
resilience4j:
  circuitBreaker:
    instances:
      default:  # Default configuration name
        ringBufferSizeInHalfOpenState: 10  # Adjust as needed
        waitDurationInOpenState: 10s  # Adjust as needed
  retry:
    instances:
      default:  # Default configuration name
        maxAttempts: 3  # Adjust as needed
        waitDuration: 1s  # Adjust as needed
  bulkhead:
    instances:
      default:  # Default configuration name
        maxConcurrentCalls: 10  # Adjust as needed
  rateLimiter:  # Requires additional configuration
    instances:
      default:  # Default configuration name
        limitForPeriod: 100  # Adjust as needed
        limitRefreshPeriod: 1m  # Adjust as needed
These configurations will be applied to all Circuit Breaker, Retry, Bulkhead, and RateLimiter instances unless overridden at the bean level.
3. Circuit Breaker Pattern:
The Circuit Breaker pattern protects your application from cascading failures by:
Monitoring Call Success/Failure: Tracks the success/failure ratio of calls to an external service.
Open/Closed/Half-Open States: The Circuit Breaker can be in Open (preventing calls), Closed (allowing calls), or Half-Open (allowing limited calls) state based on failure rates.
Configuration: You can define retry attempts, wait duration in open state, etc.
Here's an example:
Java
@Service
public class MyService {

    @CircuitBreaker(name = "myService", fallbackMethod = "fallback")
    public String callExternalService() {
        // Your logic to call the external service
        return "Success";
    }

    private String fallback(Exception ex) {
        // Handle fallback logic when Circuit Breaker trips
        return "Fallback triggered due to external service issue!";
    }
}
In this example:
@CircuitBreakerannotation on thecallExternalServicemethod enables circuit breaker functionality.nameattribute defines the circuit breaker instance name.fallbackMethodspecifies the fallback method to be called when the circuit breaker trips.
4. Retry Pattern:
The Retry pattern attempts a failing operation a certain number of times before giving up:
- Configuration: You can define the number of retry attempts, wait duration between retries, etc.
Here's an example:
Java
@Service
public class MyService {

    @Retry(name = "retryService", fallbackMethod = "fallbackOnRetry")
    public String callExternalService() {
        // Your logic to call the external service
        return "Success";
    }

    private String fallbackOnRetry(Exception ex) {
        // Handle fallback logic after retries are exhausted
        return "Failed to call external service even after retries!";
    }
}
Similar to the Circuit Breaker example:
@Retryannotation activates retry functionality for thecallExternalServicemethod.nameattribute defines the retry instance name.fallbackMethodspecifies the fallback method to be called if all retries fail.
5. Bulkhead Pattern:
The Bulkhead pattern prevents overloading a service by limiting the number of concurrent calls it can handle:
Here's an example:
Java
@Service
public class MyService {

    @Bulkhead(name = "myServiceBulkhead", maxConcurrentCalls = 10)  // Adjust as needed
    public String processData(String data) {
        // Your logic to process the data
        return "Data processed successfully!";
    }
}
In this example:
@Bulkheadannotation activates the Bulkhead pattern for theprocessDatamethod.nameattribute defines the Bulkhead instance name.maxConcurrentCallsproperty specifies the maximum number of concurrent calls allowed.
Actuator Endpoints for Resilience4j
Resilience4j leverages Spring Boot Actuator to expose endpoints for monitoring the state of its functionalities (Circuit Breaker, Retry, etc.). Here's a breakdown of the relevant endpoints and how to enable them:
Available Endpoints:
CircuitBreaker:
/actuator/health: Provides overall health status of Circuit Breakers, including open/closed state and details about individual instances./actuator/circuitbreakers: Offers detailed information about each Circuit Breaker instance, including call attempts, success/failure rates, and current state.
Retry:
/actuator/metrics: Exposes metrics related to retries, such as the number of successful/failed attempts and retry durations. (Requires additional configuration)
Bulkhead: (Limited endpoint availability)
/actuator/health: May include information about Bulkhead state as part of the overall health check. (Subject to change based on Resilience4j version)
Enabling Endpoints:
1. Enable Management Endpoint:
By default, Spring Boot Actuator endpoints are disabled for security reasons. To enable them, you need to add the following dependency to your pom.xml file:
XML
<dependency>
    <groupId>org.springframework.boot</groupId>
    <artifactId>spring-boot-starter-actuator</artifactId>
</dependency>
2. Optional Configuration (Metrics):
For detailed retry metrics, you might need to configure Micrometer and a metrics reporter in your application.yml file:
YAML
management:
  metrics:
    enabled: true
  endpoints:
    web:
      exposure:
        include: "*"  # Expose all endpoints (or specify individual endpoints)
RabbitMQ
1. Project Setup:
Ensure you have two Spring Boot microservices developed and ready for communication.
Download and install RabbitMQ server according to your operating system (instructions available on https://www.rabbitmq.com/docs/download).
2. Add Dependencies:
Add the following dependency to the pom.xml file of both your microservices:
XML
<dependency>
  <groupId>org.springframework.boot</groupId>
  <artifactId>spring-boot-starter-amqp</artifactId>
</dependency>
3. RabbitMQ Configuration (Optional):
If you're not using the default RabbitMQ instance running on localhost:5672, you can configure connection details in your microservices' application.yml files:
Producer Service:
YAML
spring:
  rabbitmq:
    host: <your-rabbitmq-host>  # Replace with your RabbitMQ server hostname/IP
    port: <your-rabbitmq-port>  # Replace with your RabbitMQ server port (default: 5672)
Consumer Service: (Same configuration as producer service)
4. Producer Service:
Define a
@RabbitListenerannotated method to listen for messages from a specific queue.Use the
@SendToannotation to specify the queue to send messages to.Utilize the
RabbitTemplatebean to send messages to the RabbitMQ broker.
Here's an example:
Java
@Service
public class ProducerService {

    @Autowired
    private RabbitTemplate rabbitTemplate;

    @SendTo("myQueue")  // Queue to send messages to
    public String sendMessage(String message) {
        rabbitTemplate.convertAndSend("myExchange", "", message);  // Exchange and routing key (optional)
        return "Message sent: " + message;
    }
}
Explanation:
@RabbitListeneris not used in the producer service in this example.@SendTo("myQueue")defines the target queue for messages sent using therabbitTemplate.rabbitTemplate.convertAndSendsends a message to the specified exchange ("" for default exchange) with an optional routing key.
5. Consumer Service:
- Define a
@RabbitListenerannotated method to handle incoming messages from a specific queue.
Here's an example:
Java
@Service
public class ConsumerService {

    @RabbitListener(queues = "myQueue")  // Queue to listen on
    public void processMessage(String message) {
        System.out.println("Received message: " + message);
        // Your logic to process the message
    }
}
Explanation:
@RabbitListener(queues = "myQueue")specifies that this method listens for messages from the "myQueue" queue.The method receives the message as a string and performs the desired processing logic.
6. Running the Services:
Start your RabbitMQ server.
Build and run each microservice using
mvn spring-boot:runor a similar command.
SAGA Pattern
https://www.youtube.com/watch?v=3gSkhhic4sM&ab_channel=JavaPuzzle
https://www.youtube.com/watch?v=WGI_ciUa3FE&ab_channel=JavaTechSolutions